

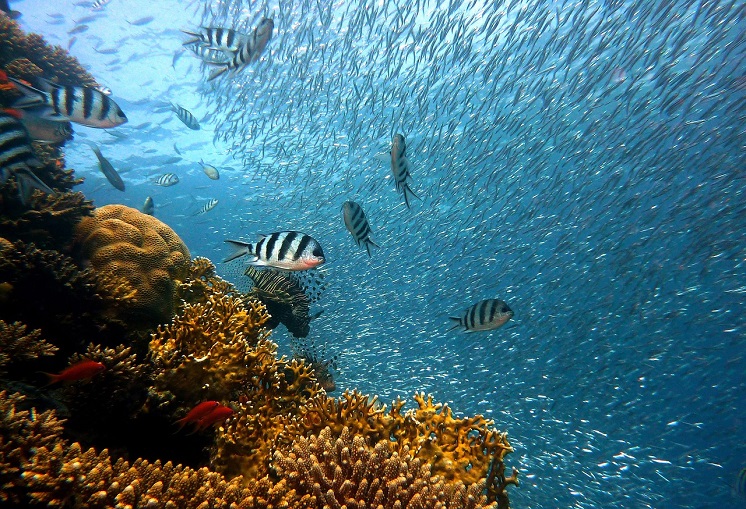
Capturing underwater footage is an incredible way to showcase the beauty of marine life, but raw clips often lack the vibrancy and clarity you’re aiming for. Editing underwater footage is essential to bring out its full potential, transforming murky or color-shifted scenes into stunning visuals that captivate your audience.
In this article, you’ll discover key techniques to enhance the visual appeal of your underwater videos. From correcting color imbalances to sharpening details and improving lighting, these tips will help you create professional-quality content that truly stands out. Whether you’re a beginner or an experienced editor, mastering these methods will elevate your underwater storytelling.
Importance Of Editing Underwater Footage
Raw underwater footage often appears dull due to reduced light absorption and color distortion. Without editing, intricate details in marine environments can remain hidden, making the visuals less engaging.
Editing offers control over critical aspects like color and clarity. Techniques such as white balance correction recover natural hues lost in deep waters. Sharpness adjustments restore fine textures, enhancing the video’s overall depth.
Consistent lighting often challenges underwater shooting. Post-production tools allow for selective brightness adjustments, ensuring subjects stand out against darker backgrounds.
Unedited audio from underwater recordings can distract viewers. Removing irrelevant noise creates a professional soundscape that complements visuals.
By addressing these challenges, you transform amateur clips into captivating visuals. You also highlight key elements like marine species or coral patterns, directing focus where it matters most.
Essential Tools For Underwater Video Editing
Underwater footage often requires significant adjustments to create visually compelling content. Effective tools address common issues such as color distortion, instability, and unclear sound.
Software Options
Choose editing software with strong color correction capabilities to restore the reds and oranges that typically fade beneath the surface. Stabilization features are essential for footage shot with a waterproof camera, helping to smooth out jitter caused by currents or diver movement.
Tools with integrated audio enhancements improve soundscapes, allowing you to adjust levels or add ambient sounds for immersion. Seek applications offering seamless transitions for merging clips, along with subtitle and voice-over tools for clearer communication in educational or narrative projects.
Hardware Recommendations
A steady capture source limits subsequent stabilization needs. Cameras with durable underwater housings reduce external interference, maintaining image quality.
Backup systems like external drives or cloud solutions safeguard raw and edited footage from potential loss. Fast processors in editing machines enable smoother rendering and playback of high-resolution underwater videos, reducing delays during post-production.
Techniques To Enhance Visual Appeal
Underwater footage often faces challenges like color distortion, backscatter, and instability. Applying effective editing techniques can transform raw clips into visually engaging content.
Color Correction And Balancing
Water absorbs warm colors like red and yellow, leaving footage with a blue or green tint. Adjusting the white balance in editing software can restore natural hues. Use color grading tools to fine-tune saturation, brightness, and contrast, ensuring marine details stand out. Applying red filters during filming can also help recover warm tones, making post-production adjustments more effective. Focus on balancing hues to depict an accurate underwater environment.
Reducing Backscatter And Noise
Unwanted particles and noise often affect the clarity of underwater videos. Backscatter, caused by light reflecting off suspended particles, can be minimized with software filters or exposure adjustments. Noise is common due to low-light conditions and can be reduced using plugins designed to eliminate grain. Concentrate on removing static interference while preserving details in the subjects. Cleaner visuals enhance both professional and amateur content.
Stabilizing Shaky Footage
Unsteady motion disrupts underwater footage, making stabilization a priority in post-production. Tools that smooth camera movements can correct jittery clips caused by currents or camera handling. Manual adjustment of stabilization parameters can provide better control over the output. Focus on maintaining fluidity to deliver a seamless viewer experience.
Adding Creative Effects
In underwater video editing, creative effects enhance the mood and replicate the serene, fluid underwater environment. Simulated water movements, bubbles, and ambient distortions immerse viewers in the scene.
Utilizing Slow Motion
Slow-motion captures the weightless movement unique to underwater visuals. It magnifies details like fish gliding or air bubbles rising. Paired with subtle music, it transforms routine shots into cinematic sequences. Use it sparingly to highlight key moments instead of slowing down entire clips, ensuring a dynamic rhythm throughout the footage.
Incorporating Transitions
Smooth transitions connect underwater and surface shots seamlessly. Techniques like match cuts, where water spans the lens before changing perspectives, create a natural flow. Crossfades or quick dissolves add variety, while direction-based swipes mimic ocean currents. Thoughtful transitions prevent abrupt scene changes that break viewer engagement.
Adding Music And Sound Effects
Audio plays a crucial role in shaping how underwater moments feel. With Insta360 footage, pairing ambient sounds like bubbles or gentle waves with music that reflects the visual rhythm can significantly elevate the experience. Use low-frequency tones to enhance calm, slower clips, or synchronize beats with key motions to emphasize action. Precision in audio syncing brings depth and emotion to underwater storytelling.
Tips For Better Workflow
Efficient editing processes maximize quality and save time. Streamlining your workflow helps you remain organized and focus on creative aspects.
Organizing Footage
Begin by reviewing every clip to find the most usable shots. Filter out footage with poor focus, unwanted noise, or irrelevant content.
Structure raw clips into sequences based on themes or chronological order. For example, group close-up marine life shots separately from wide-angle scenes to simplify editing.
Optimizing Export Settings
Select formats optimized for the intended platform—MP4 for web sharing or MOV for broadcast.
Match settings to specific platform guidelines to prevent quality loss.
Use resolutions like 4K for high-quality output or downscale to 1080p for faster export. Maintain frame rates consistent with the original footage to ensure smooth playback.
Conclusion
Editing underwater footage is your opportunity to bring out the true beauty hidden beneath the surface. By combining technical precision with creative flair, you can transform raw clips into visually stunning stories that captivate your audience.
With the right tools, techniques, and attention to detail, you’ll enhance colors, clarity, and overall impact while overcoming common underwater challenges. Every adjustment you make helps highlight the unique wonders of marine life and creates a more immersive experience for viewers.
Approach your editing process with patience and intention, and you’ll elevate your underwater videos to professional-quality masterpieces that leave a lasting impression.